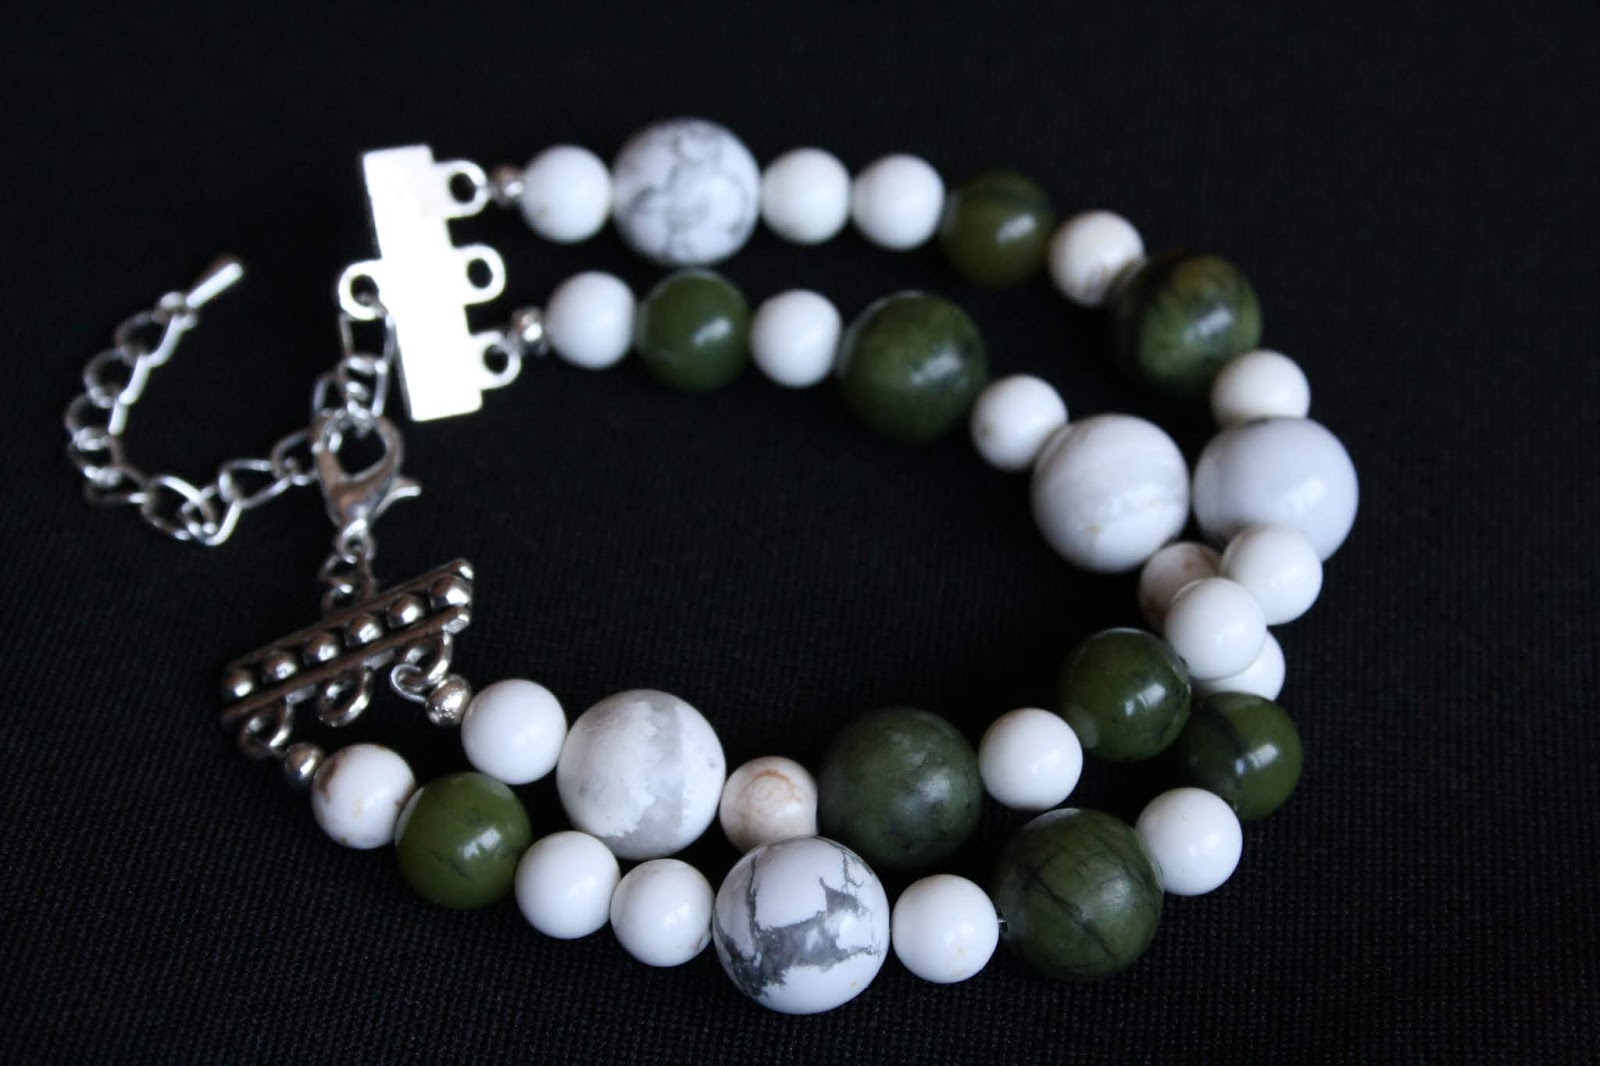
Black Ombré Faceted Multistrand Bracelet
Hi there! Today on the blog, I will be making a fancy ombré multistrand bracelet. The sparkly faceted rondelle beads from Just Bead It work perfectly with the glitzy theme of this design, and give an alluring mirror-effect in the sunlight which I just love. I hope you enjoy reading this tutorial!


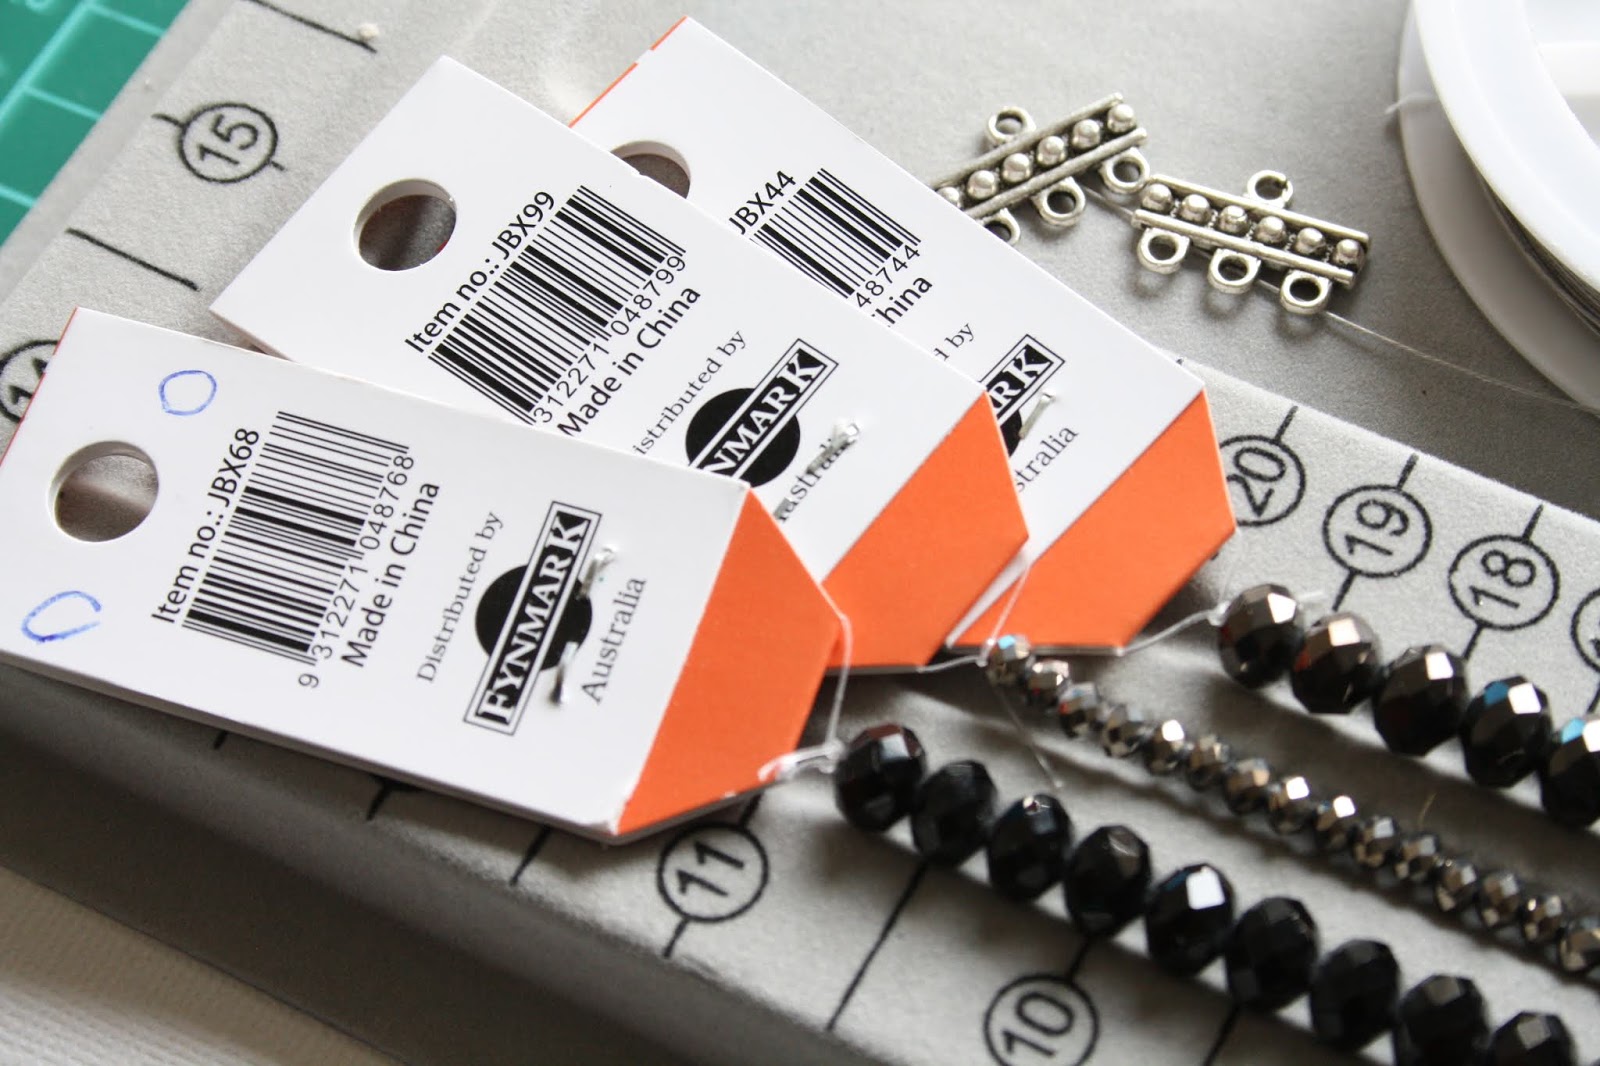
Just Bead It products used:
- JBX68 - Black Faceted Glass Rondelle Beads
- JBX44 - Dark Grey Faceted Glass Rondelle Beads
- JBX99 - Small Silver Faceted Glass Rondelle Beads
Additional products used:
- Beading wire
- Three-hole bar ends
- Silver lobster clasp
- Silver extender chain
- Crimp beads
- Silver crimp covers
- Wire cutters
- Crimping pliers

Firstly, start by attaching the first strand to the outer hole on the bar end. Add a crimp bead to a length of wire, thread the wire through the hole and back into the crimp. Then, take your crimping pliers and make an indentation in the crimp, and then press and fold it over itself to secure it in place. You can either add the crimp cover over now, or at the end (I decided to add mine at the end). Now, the wire is prepped for beading!


To begin, thread an uninterrupted stream of the JBX44 beads (medium-sized dark grey beads) onto the wire, making sure to tuck the tail of excess wire into the first few beads to hide it. Once you have reached the desired length (or you can stop halfway and start the next wire if you think that's easier), begin to attach the next wire to the middle hole of the bar end, by repeating the first step.

 |
| Make sure to tuck the excess wire through the first few beads |

Once the second wire is attached, thread the JBX99 beads (small silver beads) onto the wire until you reach your desired length. Then, just as before, begin the next strand, where you will then thread the JBX68 beads (black rondelle beads).

Once all the beads are strung, and you are happy with the length, you can begin to secure the other ends of the wires to their respective ends of the bracelet. Thread a crimp bead onto one of the lengths that need securing, and thread the wire through a second bar end and back into the crimp bead. Next, just as before, press the crimp and fold it into itself with crimping pliers to secure. Then, simply add a silver crimp cover. Likewise, repeat these same steps for the other two ends of wire.


 |
| Thread the wire through the crimp, into the hole in the bar end, and back through the crimp bead |
 |
| Pull the wire through a few of the beads for added security, and use crimping pliers to secure the crimp |
NOTE: As you are securing your bracelet, make sure that you leave a very tiny amount of room and don't pull the wire too tight when adding the crimp. This is because, when the crimp cover is later added, it will tighten the bracelet even further since that remaining space is being shortened, and that could make your bracelet very stiff and difficult to wear. Leaving a bit of room will allow the bracelet to curve nicely and as such, fit comfortably around the wrist.

Once all the wires are secured, and the excess tails have been tucked inside the beads, it was at this point that I added the crimp covers over the raw crimp beads. But again, you could choose to attach yours at the beginning. Lastly, simply attach a lobster clasp to one bar end and an extender chain to the other using regular jewellery pliers... I personally like using bent-nose pliers, but chain-nose or round-nose work well too.
 |
| Lastly, add a silver lobster clasp and extender chain |
And that's how simple it is to make a fancy-looking ombré bracelet, using the faceted rondelle beads from Just Bead It! I hope everyone had a great Easter, and I hope you have a very relaxing weekend!


I hope you enjoyed this post - hopefully this can inspire you to have a go at using some of the Just Bead It beads. Thanks for reading - happy beading!
If you would like to view more of my designs, I also have an Etsy store called
DominiquesWares which features more beaded jewellery. This particular gemstone bracelet will soon be uploaded to my store, so stay tuned for that :)
If interested, you can follow me on Twitter @DominiquesWares
You can also follow my Dominique'sWares blog
DominiquesWares which features more beaded jewellery. This particular gemstone bracelet will soon be uploaded to my store, so stay tuned for that :)
If interested, you can follow me on Twitter @DominiquesWares
You can also follow my Dominique'sWares blog