Dainty Seashell Beach Bracelet
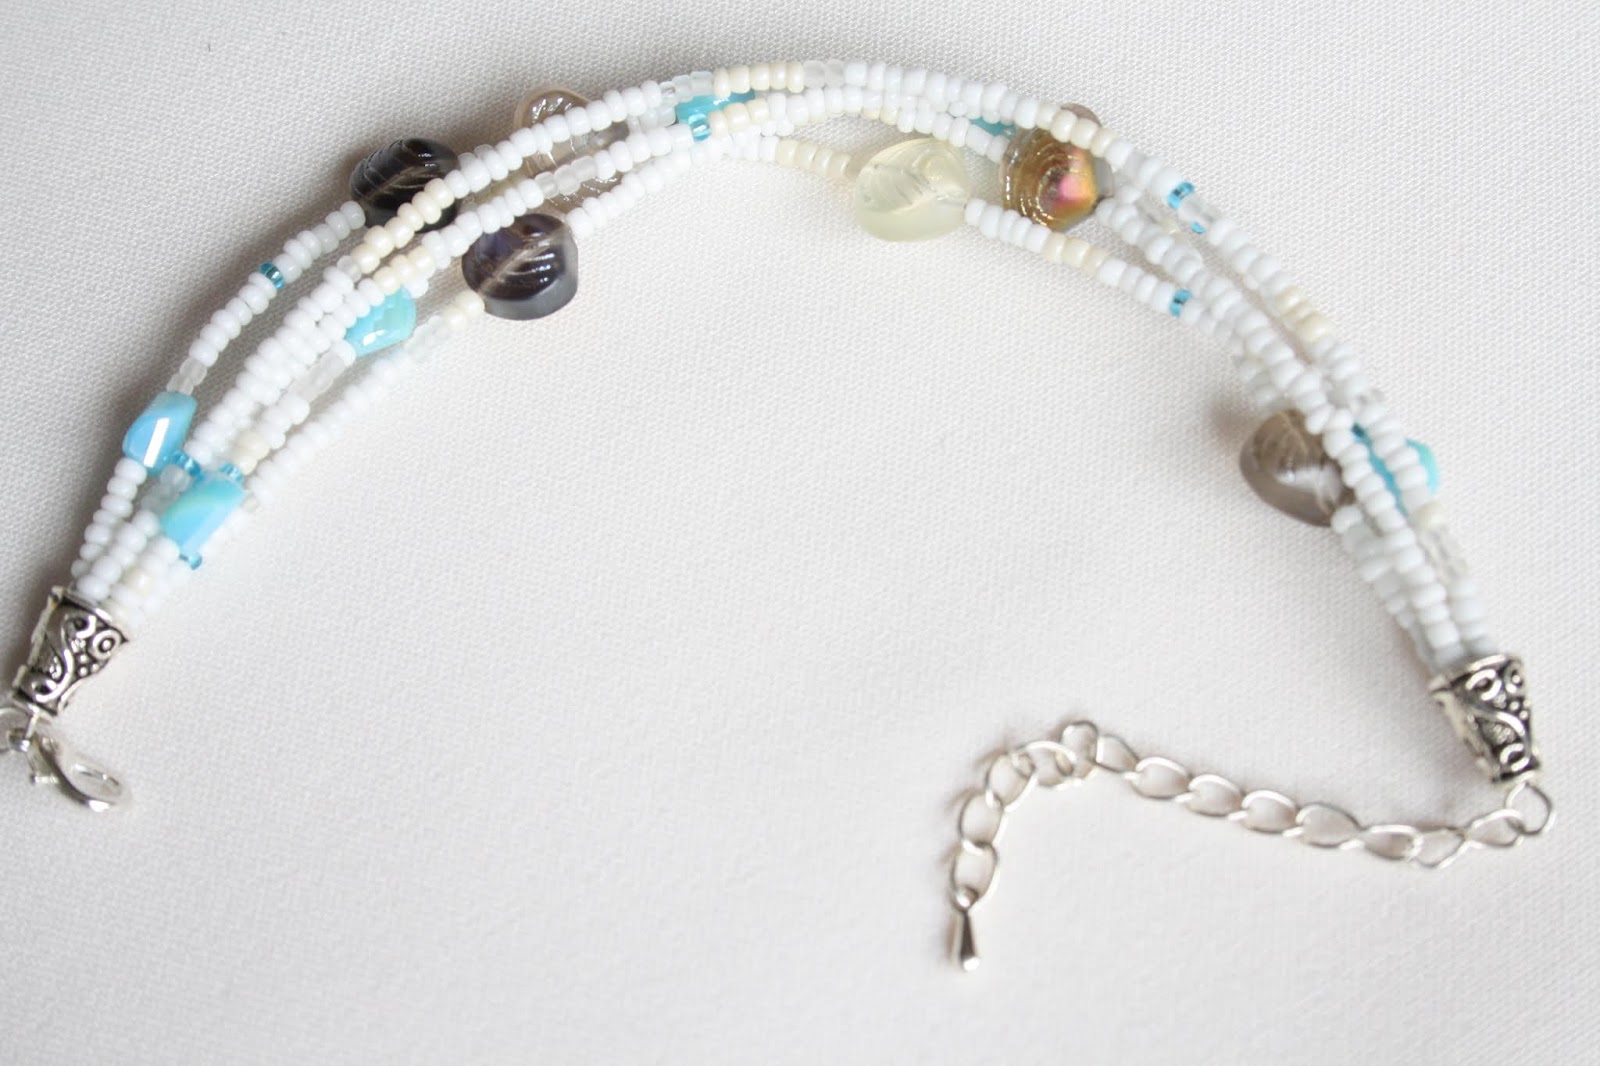
Hi there! It's Dominique here, and today on the blog, I am going to show you how to make a dainty, beach bracelet, using the newest bead range from Just Bead It! I am focusing on the adorable glass seashell beads for this main feature of this design, which reflect in the light to show different iridescent colours, depending on how you look at them. I have also used a new technique today, which involves a metal finding that I have never used before; bead cones! I really love the look they give to the finished design; all the strands are compact at each end, and in the middle they fan apart to show the design clearly when worn. Without further ado, let's get started.


Just Bead It products used:
- JBRF46 - Aqua, glass, twist beads
- JBRF15 - Glass sea shell beads
- JBZ56 - Small white seed beads
- JBI94 - Small ivory seed beads
Additional products used:
- Small frosted glass seed beads
- Silver bead cones (x2)
- Silver headpins (x2)
- Silver lobster clasp (x1)
- Silver extender chain with teardrop charm (x1)
- Beading wire
- Crimp beads (x10)
- Crimping pliers
- Wire cutters
- Round-nose pliers
- Bent-nose pliers


Firstly, this bracelet has five strands in total, so cut five equal lengths of beading wire. Using one strand at a time, begin threading a random assortment of seed beads, shell beads, and aqua twist beads. The bracelet should look effortless, so randomness is key.

As you are beading each strand, compare it to the previous one to give an indication of where you should be placing the beads, in order to keep the pattern sporadic. There shouldn't be beads in the same place on each strand, as this will interfere with the flow and shape of the design.

This beading pattern is repetitive, and continues for all five strands, so keep beading until you are happy with the randomness and length of the design. One last important step before we get to the bead cones: make sure that the last ~2cm of each strand consists of seed beads, as these will fit snugly within the bead cones (while the larger beads won't).
The only perhaps 'tricky' part of this bracelet is using the bead cones, simply because of how many crimp beads need to be used in such a small space. Nevertheless, hopefully you will follow along :)
First, arrange the strands in the order you want them to appear when the bracelet is worn, and place a single crimp bead on the end of every strand. Then, take a silver eye pin and thread it through all of the wires on one side.

For each wire, you will need to thread the strand into its respective crimp bead on the other side of the eye pin loop, and pull tight (also, I recommend letting some of the wire thread through a few of the seed beads for extra security). Then, take your crimping pliers and press to secure the crimp bead in place. Wire cutters can then be used to trim the tail. Make sure any excess wire is tucked into the beads in front.
This step is repeated for all five wires.

Once you have successfully secured each of the wires and their crimps onto the eye pin, you can now add the bead cone.
Simply thread the long, untrimmed tail of the eye pin through the wide end of the bead cone so that all the exposed crimps fit under the cone, and the eye pin's tail sticks out at the smaller end. Then, take the tail of the eye pin and bend it to a 90degree angle, and cut the excess so that a tail of about 1cm remains. With the remaining tail, use round-nose pliers to turn the wire upward and toward yourself, forming a tight loop. This should effectively secure the eye pin in place.

Next, repeat the same steps on the other side of the bracelet: secure the wires to the eye pin loop with crimps > thread the eye pin through the bead cone > form a tight loop with pliers.

Once this is done, the bracelet is almost done. Just attach a silver lobster claw clasp to the eye pin loop on one end, and a silver extender chain to the other! Do this by using bent-nose pliers to twist the loop open, add the metal finding, and close shut. I love how using the bead cones causes the wires in the middle of the bracelet to naturally twist ever so slightly, showcasing all the different strands in an interesting way.

Hooray! The bracelet is done! I really enjoyed working with the newest range of Just Bead It beads and I hope you enjoyed this tutorial blog as well!


If you would like to view more of my designs, I also have an Etsy store called
DominiquesWares which features more beaded jewellery. This particular rose quartz bracelet will soon be uploaded to my store, so stay tuned for that :)
If interested, you can follow me on Twitter @DominiquesWares
You can also follow my Dominique'sWares blog
DominiquesWares which features more beaded jewellery. This particular rose quartz bracelet will soon be uploaded to my store, so stay tuned for that :)
If interested, you can follow me on Twitter @DominiquesWares
You can also follow my Dominique'sWares blog

No comments:
Post a Comment